


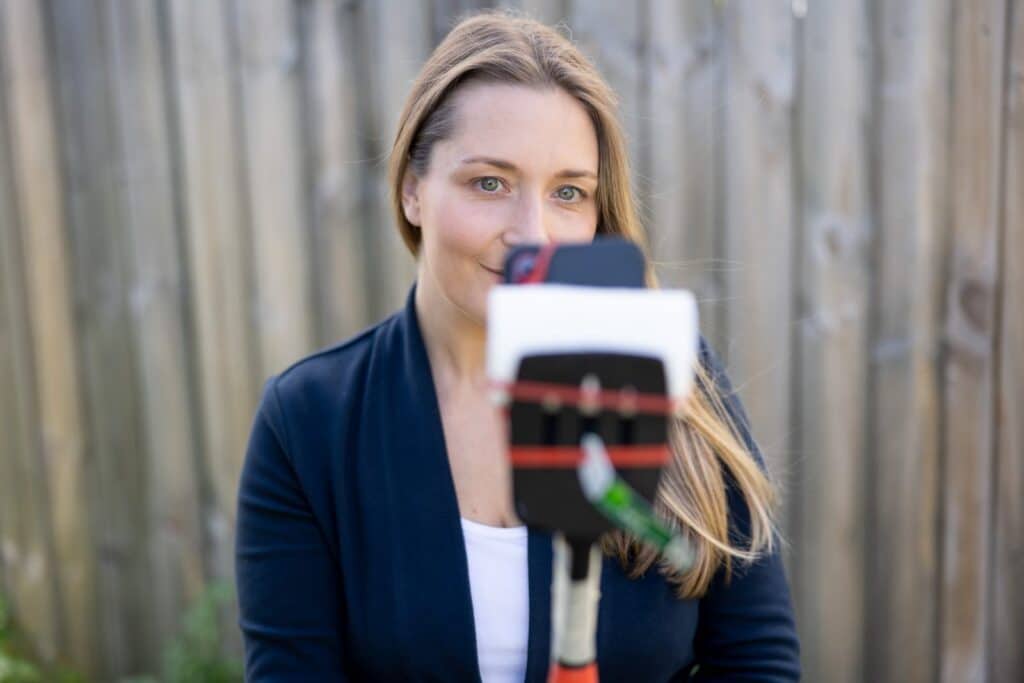
Why do I need a selfie stick?
1. If you’re taking your LinkedIn or corporate headshot yourself, using a selfie stick will allow you to position the camera further away from your body so that you can:
a) Get more of you in the frame
b) Achieve a more flattering perspective of your face, maintaining its natural proportions.
2. It will also give you more flexibility and freedom of movement so that we can move freely around your home to find the best light instead of being attached to a static set-up at a desk.
3. It will allow you to have both shoulders in a relaxed and neutral position (so that it doesn’t look like a selfie).
Taking your own professional headshot obviously isn’t the best option for a headshot but if you’re locked-down, cant get to a studio or have other restrictions preventing you from having an in-person headshot, it’s the next best thing.
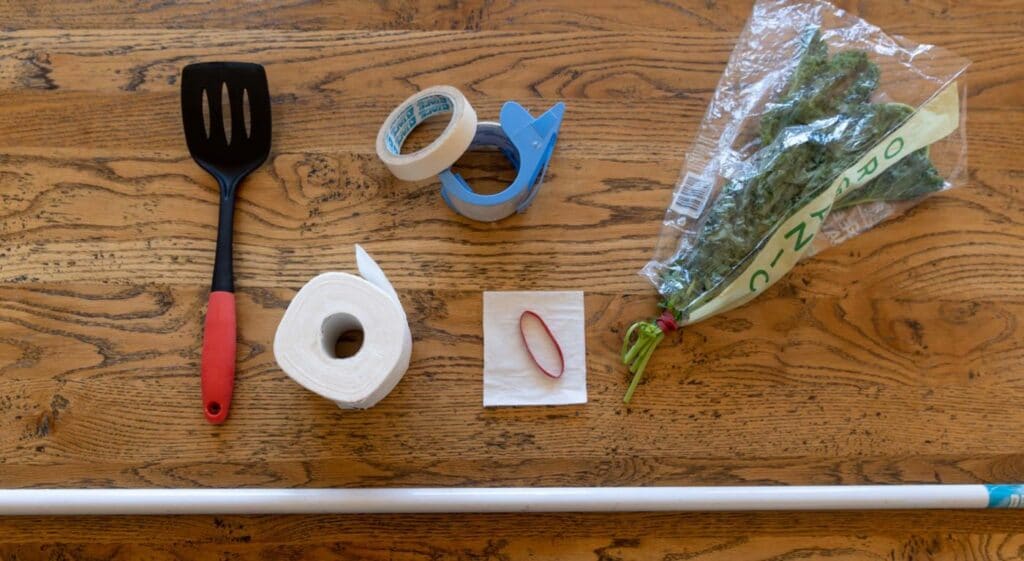
Method A: What you will need
- A spatula
- Some elastic bands (hair bands could also work here)
- Toilet roll (preferably half empty to reduce weight and size)
- Masking tape
- A broom stick/handle – ours screwed right off the brush
*Note: Whilst kale is really good for you and delicious, you won’t need it for your selfie stick. We just wanted to show you common places where you can find elastic bands 🙂
1. Attaching your phone to the spatula
The first step is to fit your phone to the spatula.
You could attach this directly to it however it will be better if we can get an angle closer to 45º off the paddle-side as in the photo below, which is where the toilet roll comes in, to prop up your phone.
You can use anything here in place of toilet roll: rolled up socks, a tennis ball, cuddly toy, anything that will allow you to angle your phone about 45º from the end of the spatula.
We used two elastic bands to secure the phone but you could also use any sticky-tape or masking tape here instead.
Note:
With all the parts, we’d recommend using the lightest ones you can find. So a plastic spatula would bet preferred over a metal one.
The same goes for toilet roll. Of course you can use other things here but a toilet roll is pretty light weight and does the job.

Having your phone on a spatula will give you a slight advantage however, we really need to extend this to get the biggest advantage.
We unscrewed the handle from a broom and fixed it to the spatula using some tape.
Having a large broom stick will also allow you to anchor the stick against your body or even between your legs for some added support.
Tip: Fixing the spatula ‘underneath’ the pole will also give you an extra contact point to prop up your phone at the bottom.

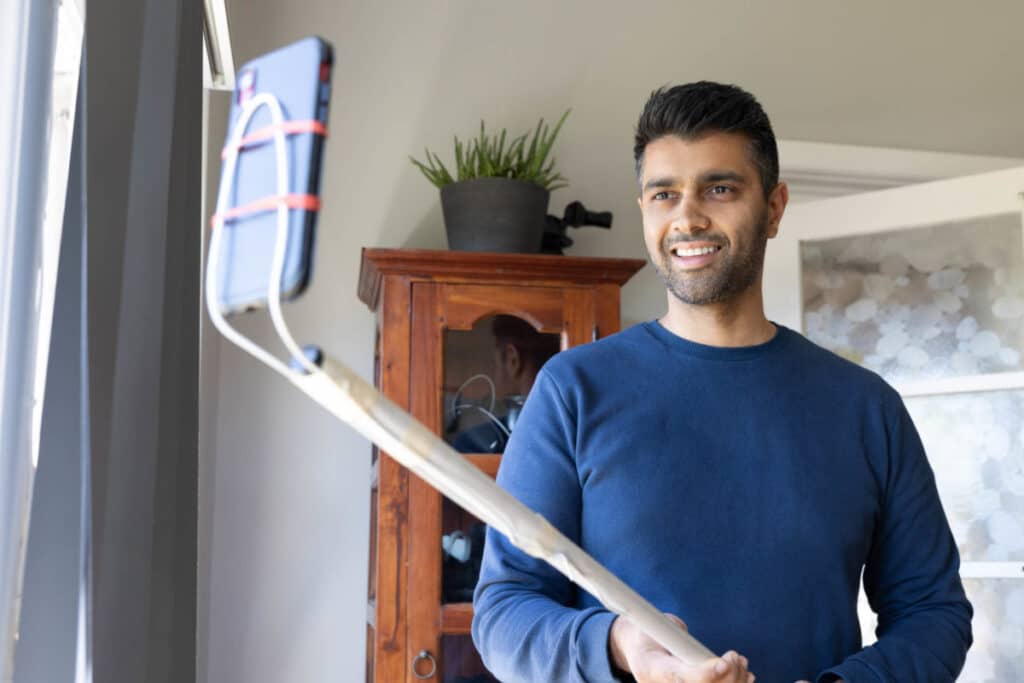
Turn on and check your camera
Once you have this set-up, you should turn on your selfie camera and position the camera like the picture above.
From here you can tweak the camera angle by pivoting it around the toilet-roll so that it sits at a comfortable angle either vertically or with a very slight downward tilt.
Due to the varied sizes of utensils available, this is something you will need to judge for yourself as it will vary from person to person.
One this is set, you’ll probably want to check how firmly attached your phone is to the selfie stick which will largely be based on how much slack you have in your elastic bands.
To be super safe, you could at this point fix your phone into position with some masking tape as the last thing we’d want is for you to drop your phone!
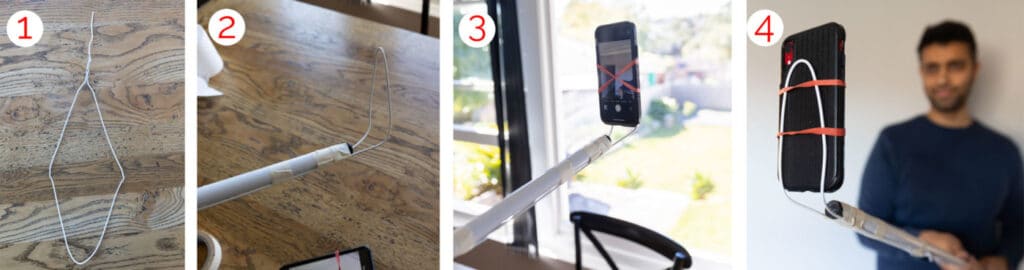
Method B – The wire-hanger method (preferred)
This method takes a bit of extra effort (and butchering a wire hanger) but it will give you some more flexibility, allowing you to angle your camera with more precision (definitely a bonus).
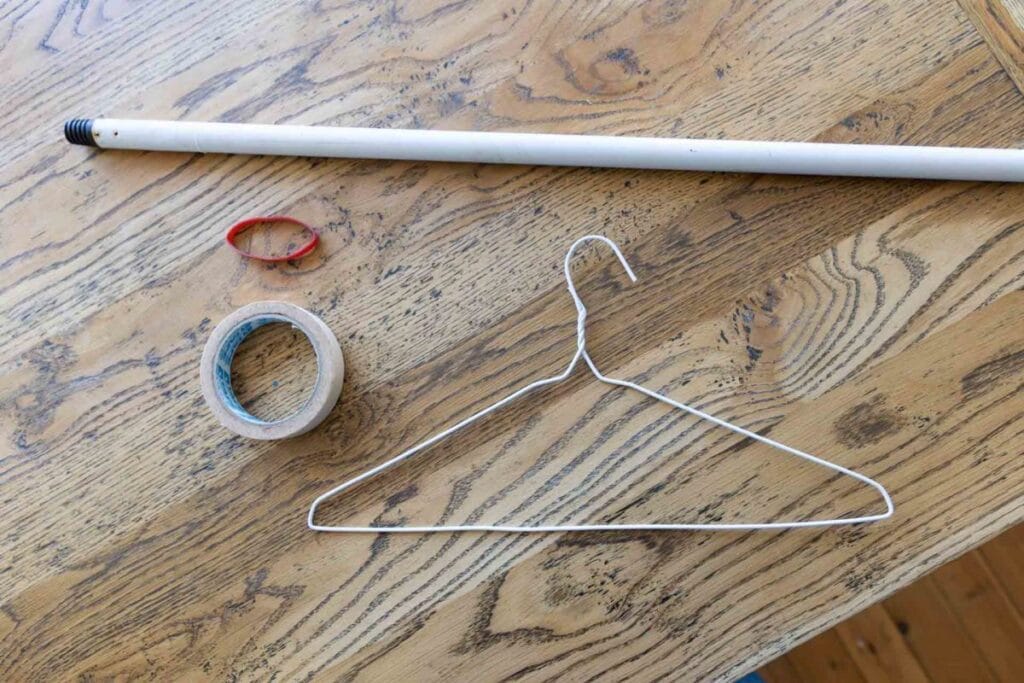
What You Will Need
- A wire coat-hanger
- Tape – Masking tape, sellotape or gaffer tape
- A stick – broom stick or a mop stick detached from the brush/mop head will be fine
- (Optional) Rubber band – You can use masking tape instead if you don’t have this.
Method
- Straighten the hanger: Straighten out the hook part of the hanger first, then bend the hanger into a diamond shape by squeezing it inwards from the outer corners. You may need to pull from the centre point downwards to aid in this.
- Attach the hanger to the broom stick using your preferred tape, leaving about 10-15cm of overhang (this will be used to support your phone)
- Having a few connection points of tape to the hanger is recommended (3+) and will keep your selfie stick more stable. You may need to squeeze the sides of the hanger in more as you fix the hanger to the stick, ensuring the very top part and bottom are fastened securely.
- bend over the overhanging end of the hanger to almost 90º (you can tweak this angle later)
- Attach your phone to the hanger using a rubber band or tape. If using a rubber band, for added stability consider doubling this up and spacing out the wrap as in figures 3 and 4. One side will be crossed and the other side will show as two bands. With tighter bands you can use two bands spaced out for the same effect.
- Give this a test and a little shake to ensure its holding your phone securely. If it’s wobbly you may need to add more tape to fasten the hanger more tightly to the stick or tighten your bands on holding your phone.
Once you’ve created your selfie stick and are happy that your phone is held securely:
- Turn on your inward/ selfie camera
- Extend the stick till you are able to see the corner of both shoulders in the frame (or close to), when the camera is positioned at eye-level.
- Adjust the angle of the camera to suit by bending the wire and phone up or down.
- Voila! You are now the proud owner of a selfie stick 🙂
*Disclaimer: These methods worked really well for us but individual results may vary depending on how well you complete each of the steps. Hero Shot Photography is in no way responsible for any damage that may occur as a result of this guide.


